
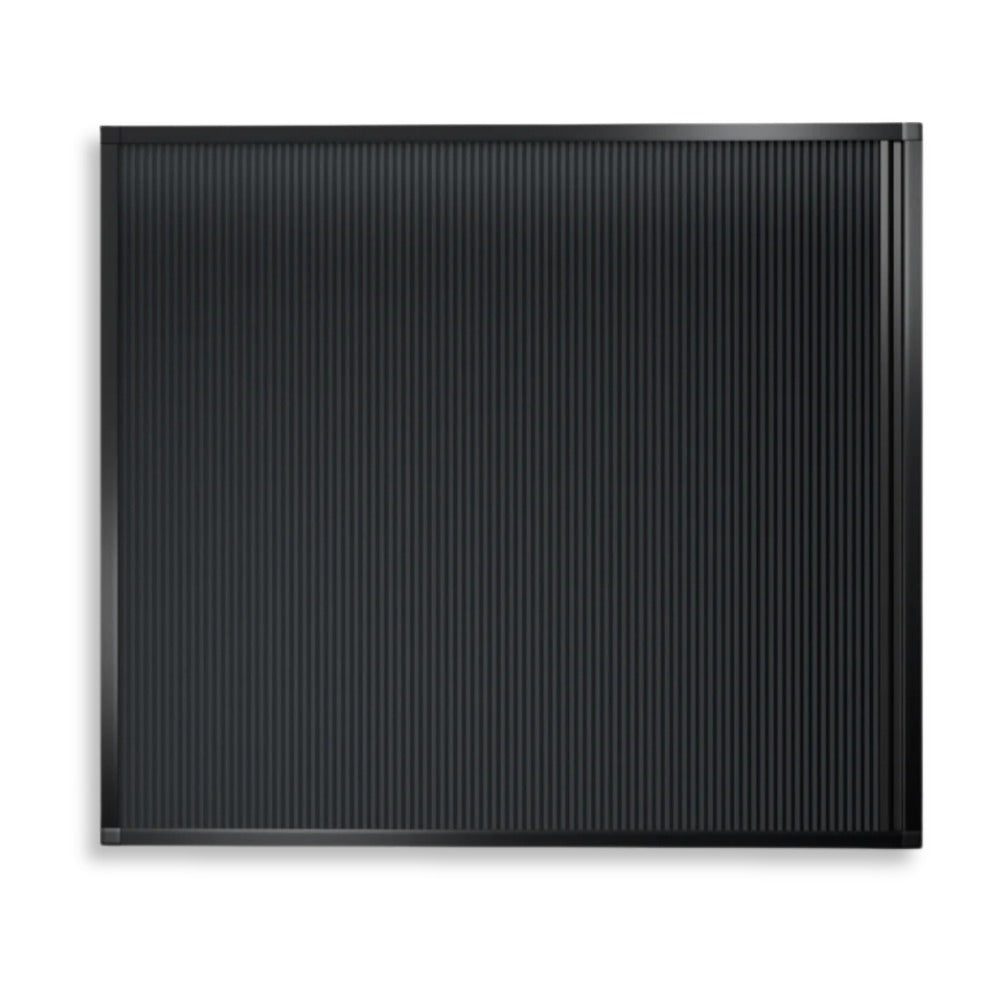


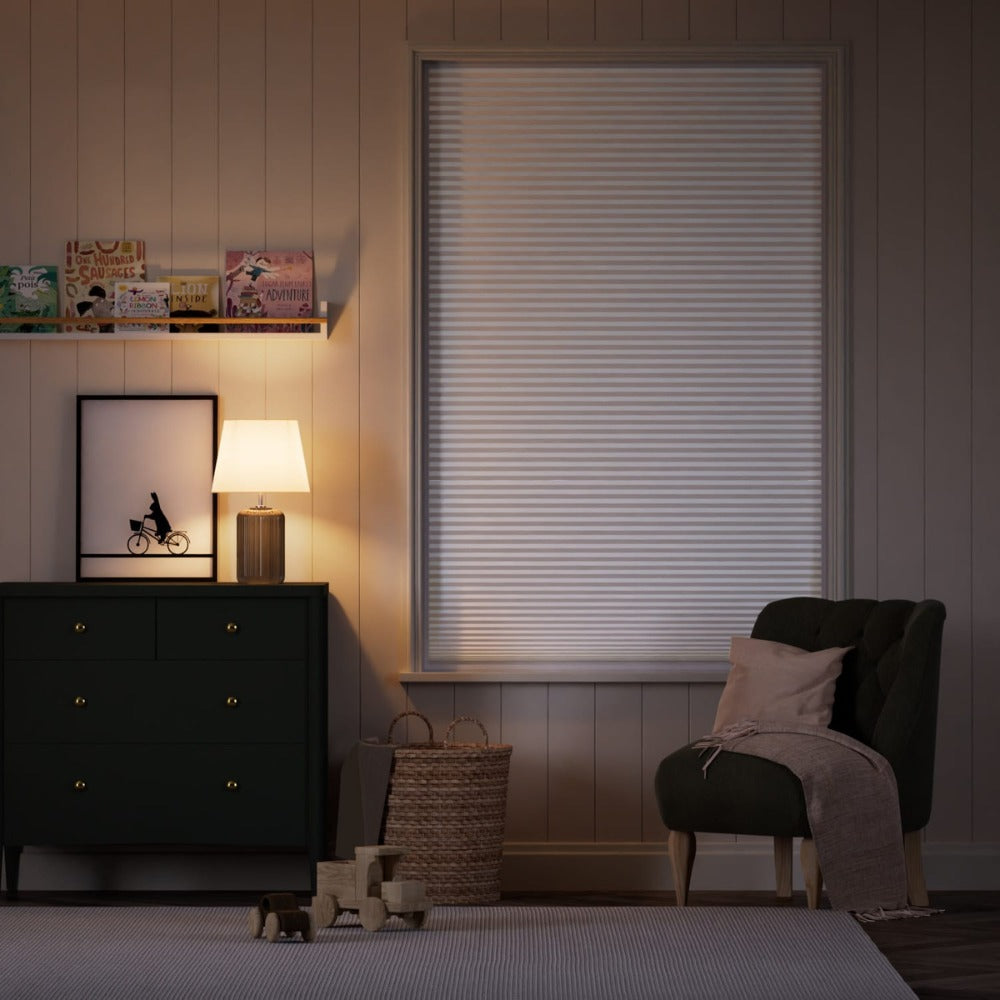
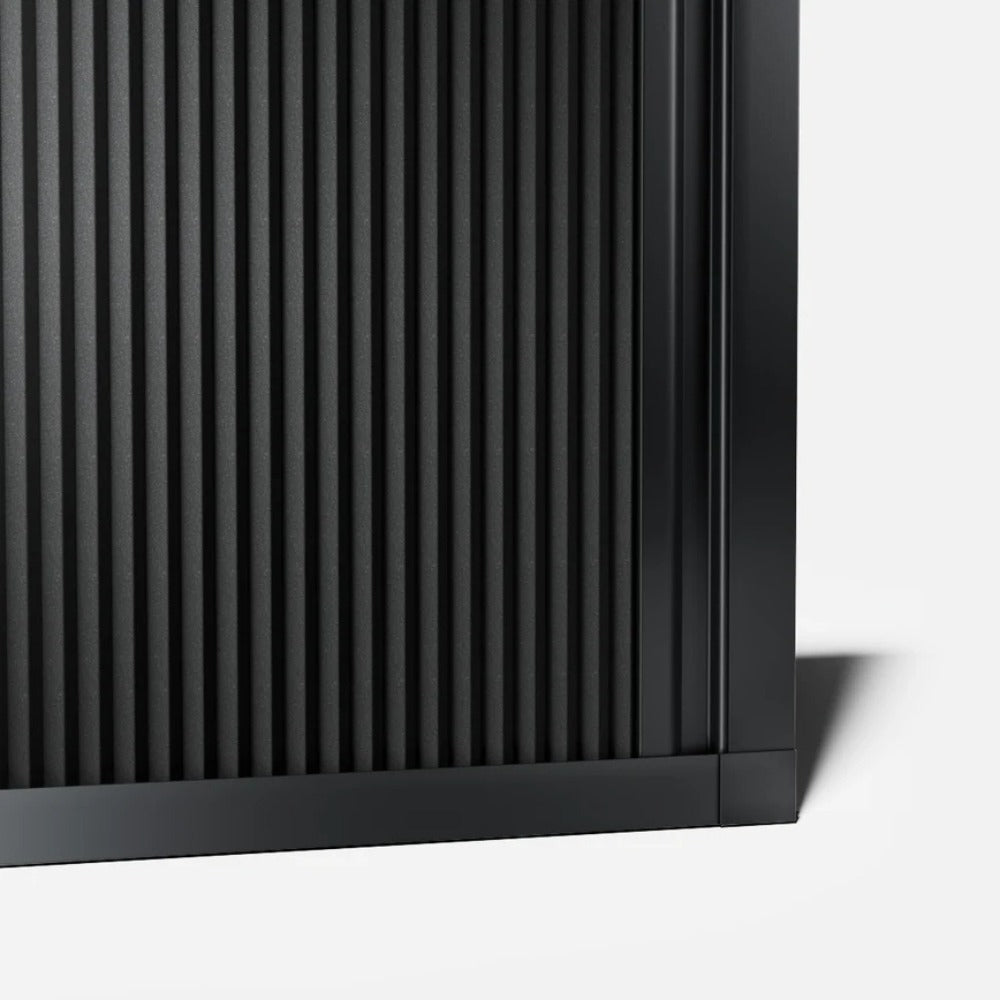

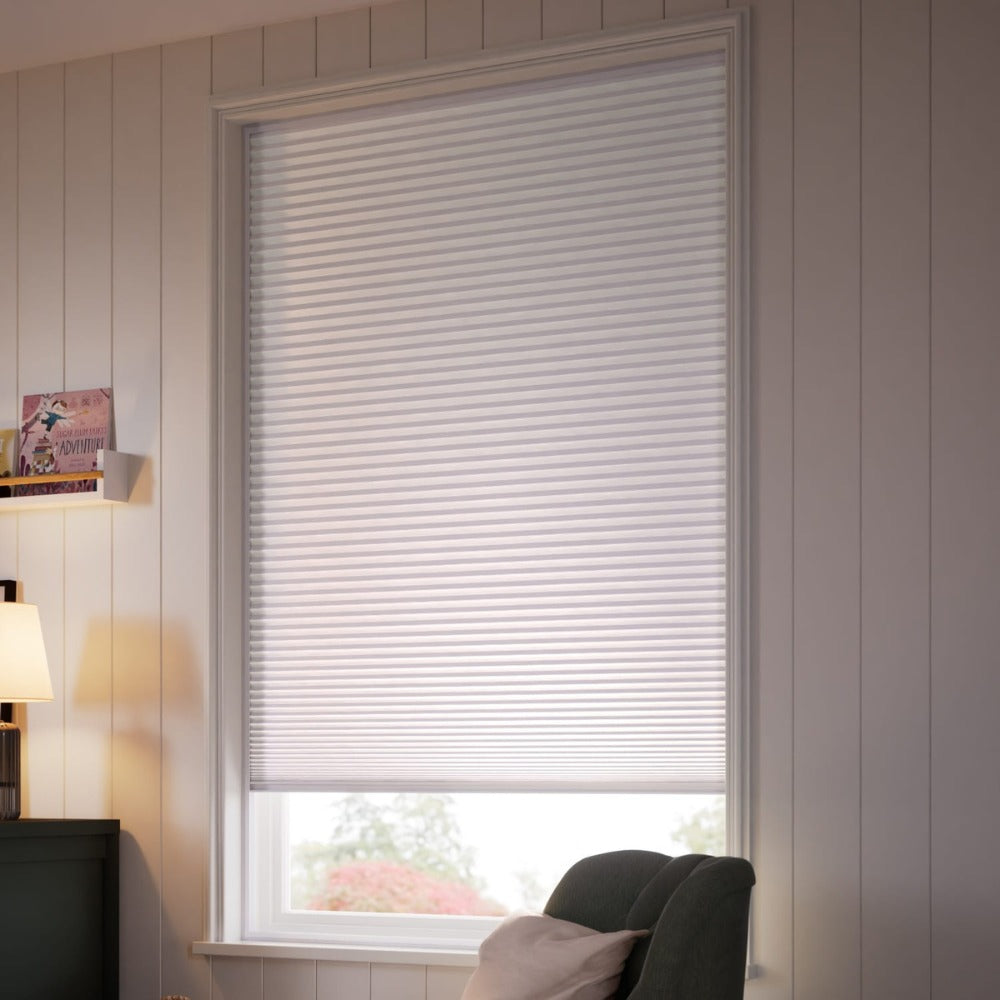
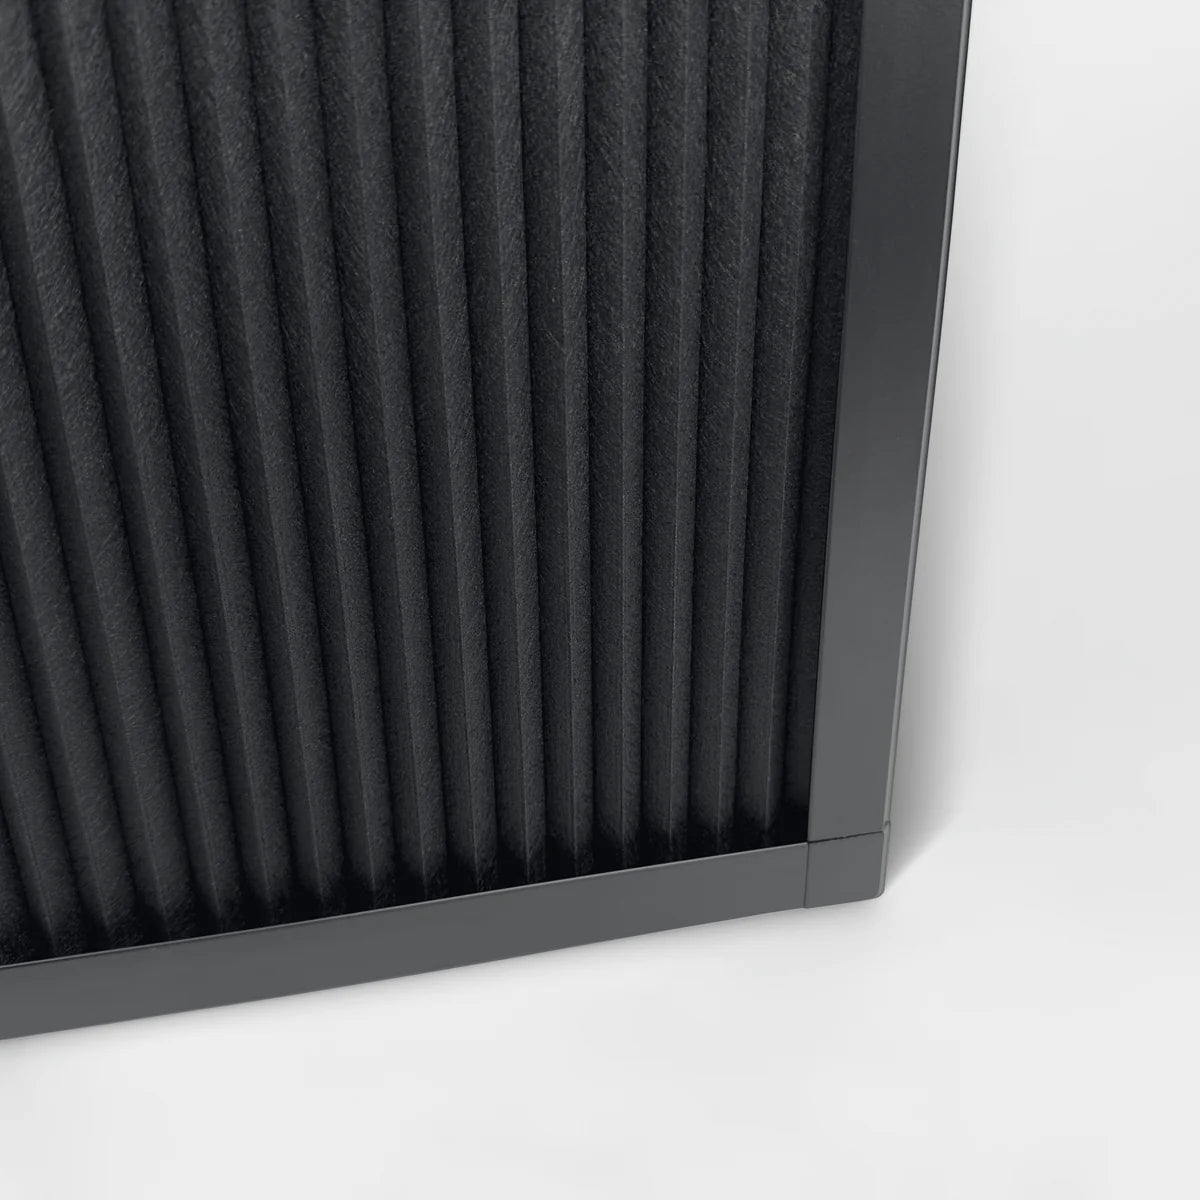
Total Blackout Blind
These unique blinds block 100% of the light without leaving any gaps, ensuring total blackout at any time of the day. They effectively keep the room cool in the summer and retain heat in the winter, while also reducing noise for a calm and peaceful environment.
Product information
- Custom fit
- Complete blackout design
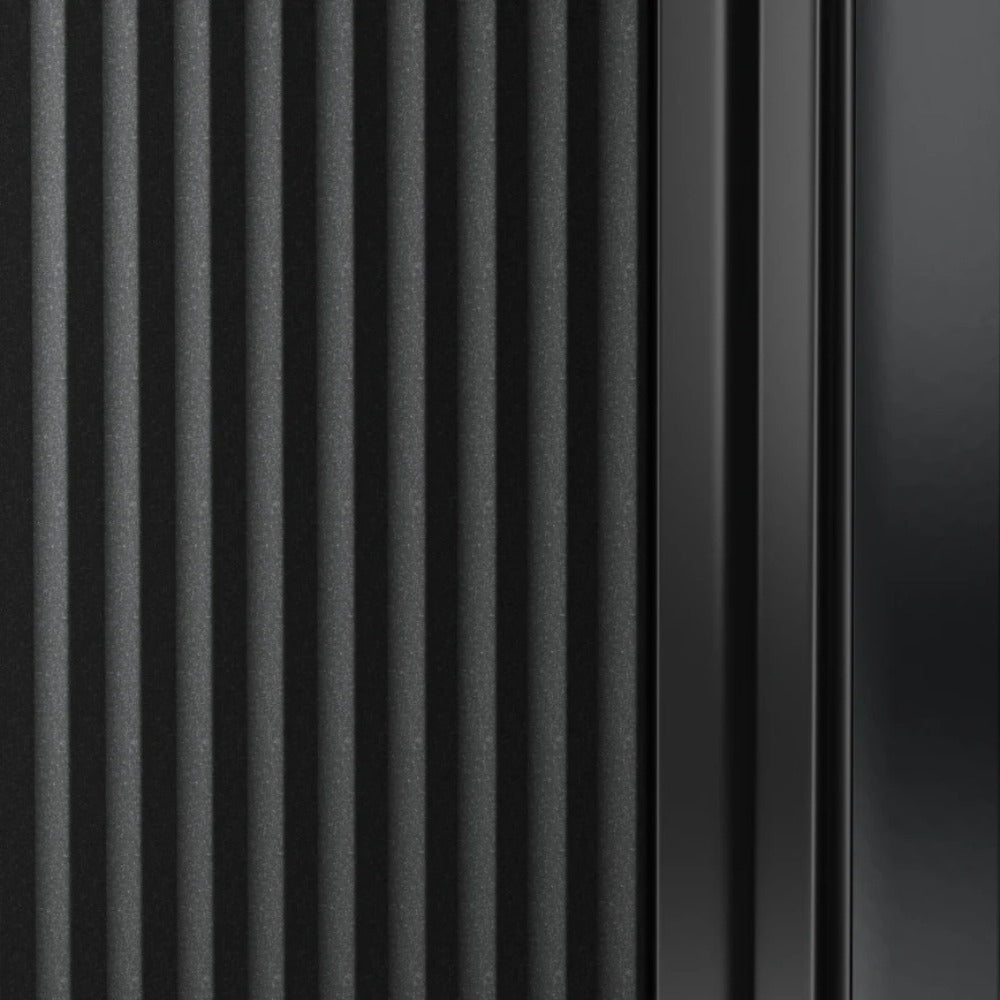
- Aluminum frame
- Non-woven polyester fabric
- 10-minute installation without drilling
- Thermal insulation
- Sound reduction
- Wireless & child-safe
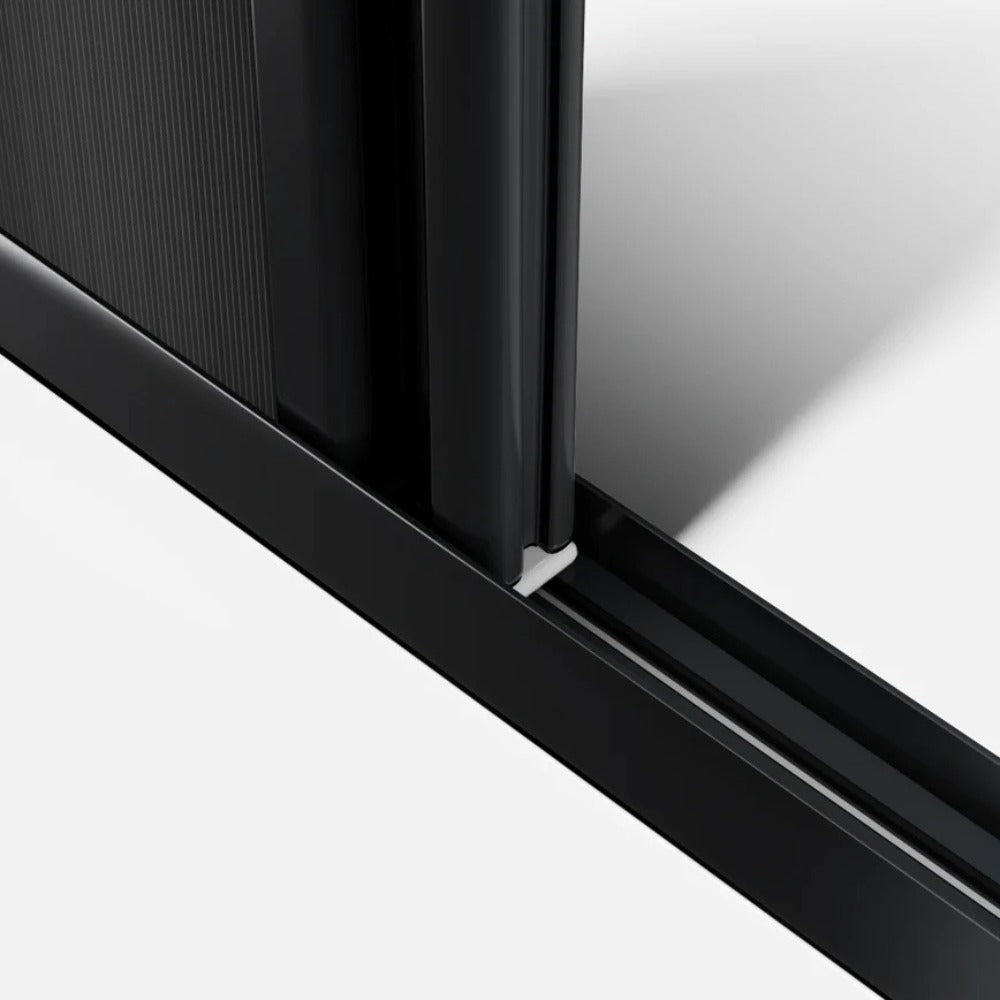
Total Blackout
Our blinds are custom-made for a perfect fit and feature an advanced track system that blocks all light. The double-layered cell structure combines durable polyester with a thermal barrier to effectively keep out both light and heat, providing maximum comfort around the clock.
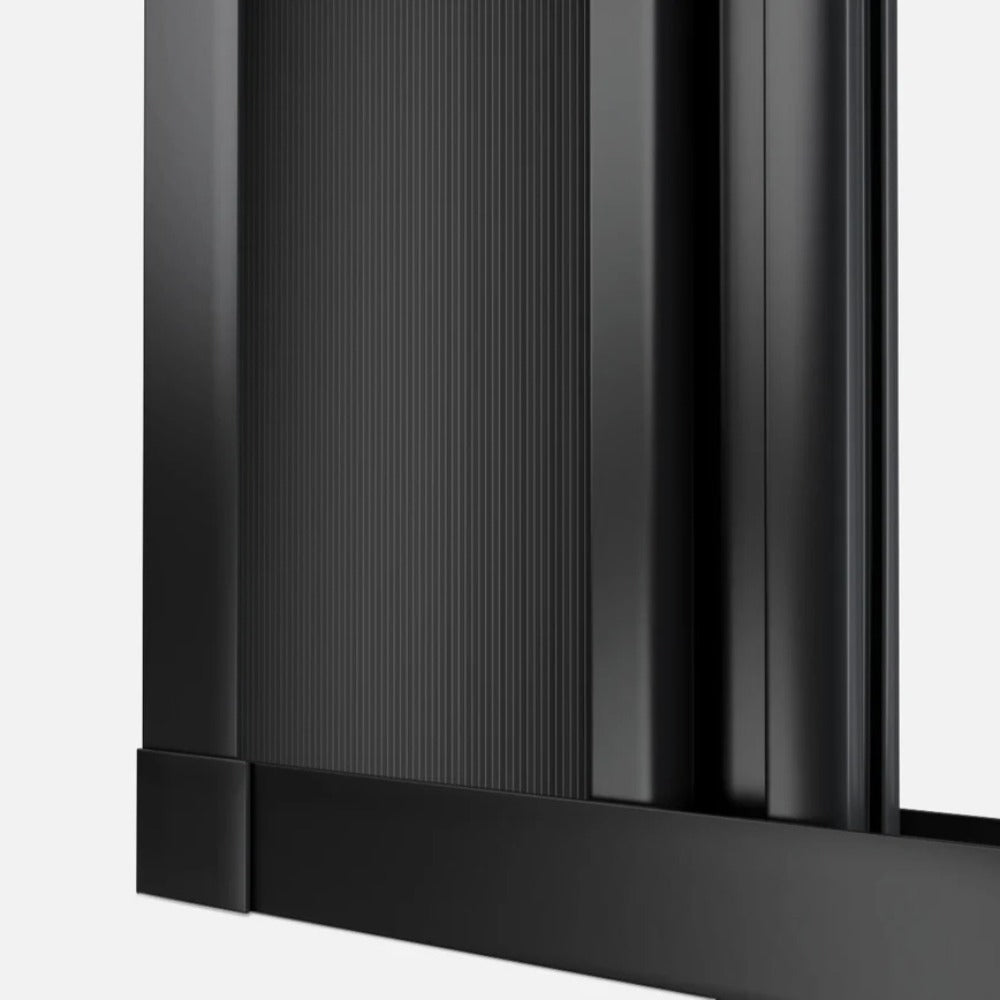
Soundproofing
The sound-absorbing, fiber cloth-covered cell structure reduces disturbing noise from outside and creates a perfect sleeping environment.
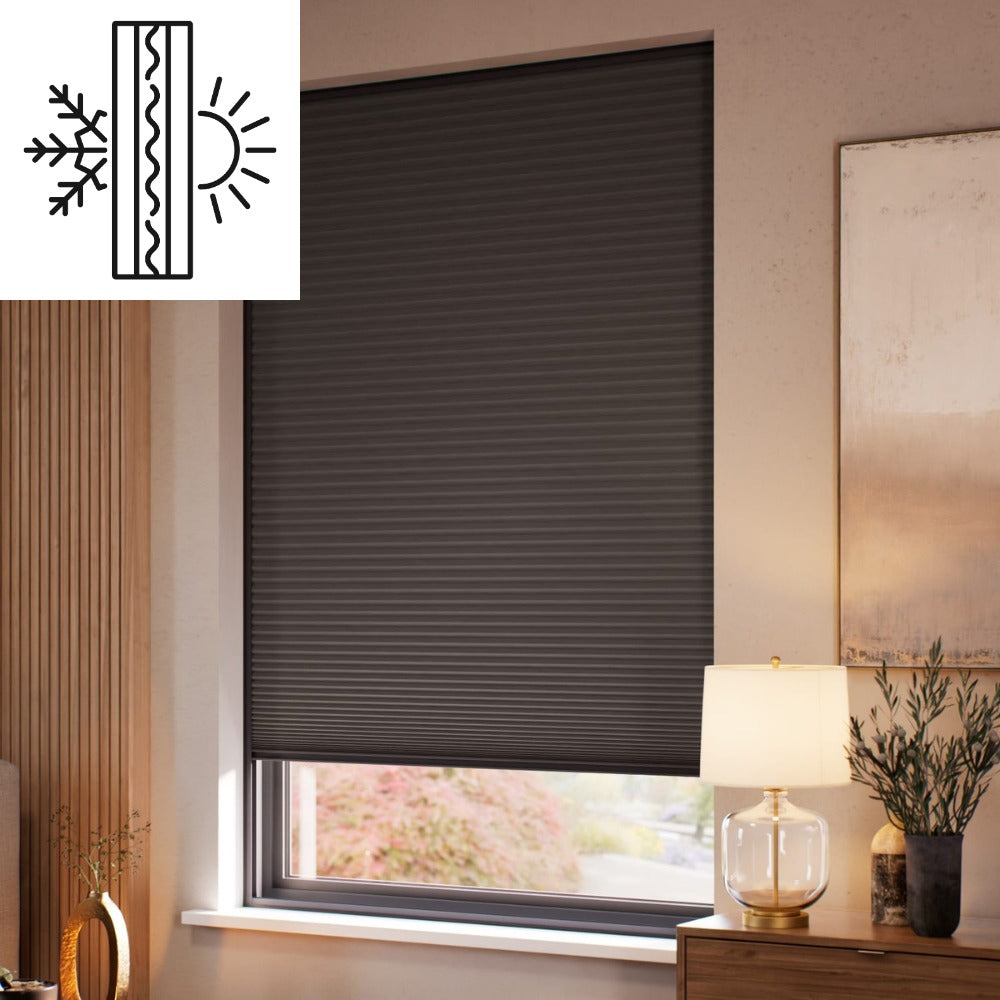
Insulating Against Heat & Cold
The unique cellular fabric technology combined with reflective thermal fabric blocks summer heat and retains warmth during winter, making your home comfortable and energy-efficient all year round.

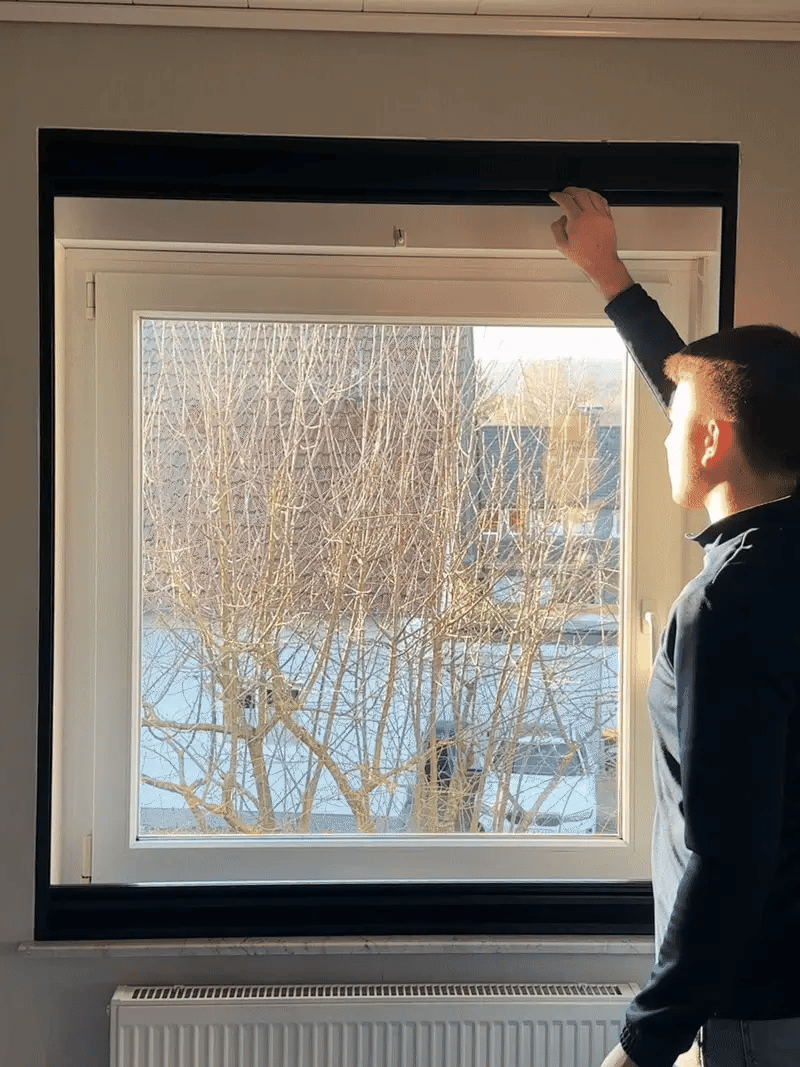
Easy to Install
The blackout curtain is designed for quick and easy installation without the need for tools or special skills. Just follow our step-by-step guide, and it will be installed in less than 10 minutes.
Measurement Guide
Step 1: Measuring the window niche depth
Before you measure the width and height of your window, it is important to check the recess depth to ensure there is enough space for the covering to fit.
- Minimum niche depth required: 3 centimeters for correct installation.
- Here's how to measure: Start at the front edge of the window niche (the part that is farthest from the window) and measure to the shallowest point within the niche.

Watch out for obstacles
Common obstacles in your window niche include:
- Window handle
- Lock bracket
- Locking mechanisms
- Cranks or crank mechanisms

Measurement with obstacles
Even if your window niche is deep, obstacles can prevent the blinds from closing properly. To ensure everything fits:
- Measure the niche depth from the front edge of the niche to the window.
- Measure the obstacle depth from the front of the window to the front edge of the obstacle (e.g. a handle).
- Subtract the obstacle depth from the niche depth to obtain your unobstructed space.
Important: You need at least 3 centimeters of unobstructed space to be able to install the blind safely.

Step 2: Measuring the width
Since windows are often not perfectly square, you need to measure the width at three different places to account for any irregularities:
- At the top of the window niche
- Middle of the window niche
- At the bottom of the window niche
Note the smallest of these three measurements. This ensures that your blind fits even at the narrowest point of the window.

Step 3: Measuring the height
Then measure the height of your window niche. Again, take measurements from three different places:
- Left side of the window niche
- Middle of the window niche
- Right side of the window niche
Just like with the width, note the smallest of these three measurements.

Avoid common measurement errors
To get the most accurate measurements, avoid these common mistakes:
- Measurement at an angle: Always keep the measuring tape straight and level.
- Bendable measuring tape: Make sure the measuring tape is taut to get accurate measurements.
- Incorrect rounding: If necessary, round to the nearest millimeter.

Guide for measurement & installation
Guide for measurement
Step 1: Measuring the window niche depth
Before you measure the width and height of your window, it is important to check the recess depth to ensure there is enough space for the covering to fit.
- Minimum niche depth required: 3 centimeters for correct installation.
- Here's how to measure: Start at the front edge of the window niche (the part that is farthest from the window) and measure to the shallowest point within the niche.
Watch out for obstacles
Common obstacles in your window niche include:
- Window handle
- Lock bracket
- Locking mechanisms
- Cranks or crank mechanisms
Measurement with obstacles
Even if your window niche is deep, obstacles can prevent the blinds from closing properly. To ensure everything fits:
- Measure the niche depth from the front edge of the niche to the window.
- Measure the obstacle depth from the front of the window to the front edge of the obstacle (e.g. a handle).
- Subtract the obstacle depth from the niche depth to obtain your unobstructed space.
Important: You need at least 3 centimeters of unobstructed space to be able to install the blind safely.
Step 2: Measuring the width
Since windows are often not perfectly square, you need to measure the width at three different places to account for any irregularities:
- At the top of the window niche
- Middle of the window niche
- At the bottom of the window niche
Note the smallest of these three measurements. This ensures that your blind fits even at the narrowest point of the window.
Step 3: Measuring the height
Then measure the height of your window niche. Again, take measurements from three different places:
- Left side of the window niche
- Middle of the window niche
- Right side of the window niche
Just like with the width, note the smallest of these three measurements.
Avoid common measurement errors
To get the most accurate measurements, avoid these common mistakes:
- Measurement at an angle: Always keep the measuring tape straight and level.
- Bendable measuring tape: Make sure the measuring tape is taut to get accurate measurements.
- Incorrect rounding: If necessary, round to the nearest millimeter.
Installation guide
Four steps to install the blackout curtains
Step 1: Lay out the frames
- Unpack all parts: Place the top frame, the bottom frame, and the side frames on a clean and flat surface.
- Place the upper and lower frame: Place the upper and lower frame parallel to each other on a horizontal surface

Step 2: Attach the frame connections
Attach a frame connector to one end of the frame with the fabric, and then attach the other connector to the other end.

Step 3: Connect the frames
Connect all frames by attaching the fabric and side frame to the top and bottom frame.

Step 4: Tighten the laces
Pull one slider down inside the frame and push the other slider up to tighten the laces properly.

Four steps for installation
Step 1: Cut the foam tape
Split the included foam tape into two equal parts

Step 2: Remove the protective paper from the foam tape
Remove the protective paper from the foam tape to expose the sticky side.

Step 3: Apply the foam tape
Apply the foam tape to all 4 sides of your blind. Make sure all sides are properly covered without any gaps.

Step 4: Insert and test the blind
Place the blind in the window opening. Test the curtain by pulling the fabric frame to the left.

Frequently Asked Questions
Question: What makes it different compared to other blackout curtains?
AnswerThese have a unique rail system that eliminates gaps between the curtain and the window frame to ensure total blackout. The double-layered cellular fabric combines non-woven polyester with a reflective thermal barrier to block light, insulate against heat, and dampen sound.
_
Question: Are these suitable for all window types?
AnswerOur blinds are designed to fit most standard windows, but there are a few things to consider.
They do not fit windows that are not square. In addition, the blind requires at least 3 centimeter unobstructed niche depth (the depth from the front edge of the window opening to the window) for proper installation. If your window does not meet these criteria, these may not be the right choice for you.
_
Question: Does it require any special maintenance?
AnswerMinimal maintenance is required. The non-woven polyester fabric repels dust and stains and only needs to be wiped down with a damp cloth occasionally. No cleaning agents or treatments are needed.
_
Question: How does the blind look from the outside?
Answer: The inside of the Guard matches your fabric choice, while the outside is always Quartz to reflect light and maximize blackout.
Step 1: Measuring the window niche depth
Before you measure the width and height of your window, it is important to check the recess depth to ensure there is enough space for the covering to fit.
- Minimum niche depth required: 3 centimeters for correct installation.
- Here's how to measure: Start at the front edge of the window niche (the part that is farthest from the window) and measure to the shallowest point within the niche.
Watch out for obstacles
Common obstacles in your window niche include:
- Window handle
- Lock bracket
- Locking mechanisms
- Cranks or crank mechanisms
Measurement with obstacles
Even if your window niche is deep, obstacles can prevent the blinds from closing properly. To ensure everything fits:
- Measure the niche depth from the front edge of the niche to the window.
- Measure the obstacle depth from the front of the window to the front edge of the obstacle (e.g. a handle).
- Subtract the obstacle depth from the niche depth to obtain your unobstructed space.
Important: You need at least 3 centimeters of unobstructed space to be able to install the blind safely.
Step 2: Measuring the width
Since windows are often not perfectly square, you need to measure the width at three different places to account for any irregularities:
- At the top of the window niche
- Middle of the window niche
- At the bottom of the window niche
Note the smallest of these three measurements. This ensures that your blind fits even at the narrowest point of the window.
Step 3: Measuring the height
Then measure the height of your window niche. Again, take measurements from three different places:
- Left side of the window niche
- Middle of the window niche
- Right side of the window niche
Just like with the width, note the smallest of these three measurements.
Avoid common measurement errors
To get the most accurate measurements, avoid these common mistakes:
- Measurement at an angle: Always keep the measuring tape straight and level.
- Bendable measuring tape: Make sure the measuring tape is taut to get accurate measurements.
- Incorrect rounding: If necessary, round to the nearest millimeter.
Four steps to install the blackout curtains
Step 1: Lay out the frames
- Unpack all parts: Place the top frame, the bottom frame, and the side frames on a clean and flat surface.
- Place the upper and lower frame: Place the upper and lower frame parallel to each other on a horizontal surface
Step 2: Attach the frame connections
Attach a frame connector to one end of the frame with the fabric, and then attach the other connector to the other end.
Step 3: Connect the frames
Connect all frames by attaching the fabric and side frame to the top and bottom frame.
Step 4: Tighten the laces
Pull one slider down inside the frame and push the other slider up to tighten the laces properly.
Four steps for installation
Step 1: Cut the foam tape
Split the included foam tape into two equal parts
Step 2: Remove the protective paper from the foam tape
Remove the protective paper from the foam tape to expose the sticky side.
Step 3: Apply the foam tape
Apply the foam tape to all 4 sides of your blind. Make sure all sides are properly covered without any gaps.
Step 4: Insert and test the blind
Place the blind in the window opening. Test the curtain by pulling the fabric frame to the left.
Question: What makes it different compared to other blackout curtains?
AnswerThese have a unique rail system that eliminates gaps between the curtain and the window frame to ensure total blackout. The double-layered cellular fabric combines non-woven polyester with a reflective thermal barrier to block light, insulate against heat, and dampen sound.
_
Question: Are these suitable for all window types?
AnswerOur blinds are designed to fit most standard windows, but there are a few things to consider.
They do not fit windows that are not square. In addition, the blind requires at least 3 centimeter unobstructed niche depth (the depth from the front edge of the window opening to the window) for proper installation. If your window does not meet these criteria, these may not be the right choice for you.
_
Question: Does it require any special maintenance?
AnswerMinimal maintenance is required. The non-woven polyester fabric repels dust and stains and only needs to be wiped down with a damp cloth occasionally. No cleaning agents or treatments are needed.
_
Question: How does the blind look from the outside?
Answer: The inside of the Guard matches your fabric choice, while the outside is always Quartz to reflect light and maximize blackout.